Different Ways to Lay Tile
October 31, 2019
October 31, 2019
Whether you’re a seasoned interior design enthusiast or a total tile novice, one thing every creative should know is that there are various ways to make the same tile have different effects. The common denominator in this interior design approach is the tile. The only thing that changes to give a different look is the way that you lay it. Really, it is that simple!
If you take a few pieces of tile from the same batch and start changing the way they’re laid, how many different and visually appealing ways can you come up with? We came up with 9. No doubt, there are probably more ways, but these were the favorites.
Let’s talk about them a little bit more.
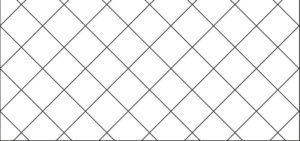
First, lay the tiles in a stack bond design (which we’ll talk about later) and then to create the diagonal effect, you’ll want to rotate each tile 45 degrees. The diagonal tile lay is often used to make small rooms appear bigger. An ideal space for the diagonal lay is a small bathroom.
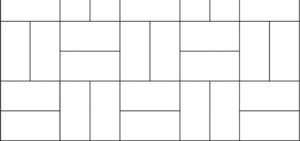
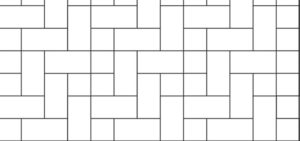
The windmill lay can make gorgeous tile designs pop even more! At first, this approach can be pretty intense and complicated. But, once the pattern foundation gets laid, the process speeds up. The way it works is by using four brick/rectangle tiles that wrap around a smaller, square tile. This is definitely a bold option, so minimalistic design fans might not be interested. To add even more pop to this design, use a striking grout color to accent the tiles!

When rectangle tiles are laid in a 45 degree angle, and in a v-shape, it’s called the herringbone lay. Similar to the diagonal approach, herringbone helps create space within a room. This style got its start in Europe and has been used for centuries. It is an elegant and classic addition when used. The bad news is that it’s far too complicated for DIYers or novice tile lovers. Talk to a pro about installation support if you want to go for a herringbone lay!
For a cobblestone lay, you’ll start using the herringbone technique with rectangle tiles. The difference is that each layer line will alternate from rectangle tile to square tile. Square tiles make the overall design appear to be larger than it actually is, which again, can help visually add space to a room.
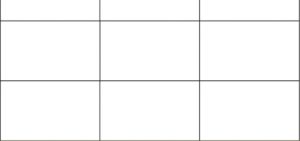
This kind of tile laying is the most straightforward, which is why it’s also known as a straight lay. The description of how to do it is in the name: take the tiles, and stack them in a straight line, side by side. It is important to note that this is by far the easiest tile lay to achieve and is also the most common. It is a great option for beginners or DIYers.
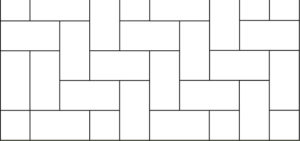
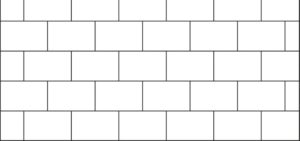
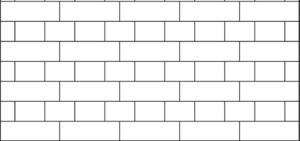
This approach creates a “uniform but not” look. At first glance, the design looks staggered, but upon analysis, you’ll see that it is anything but out of order. To achieve the stretcher lay, use square or rectangle tiles. When laid out properly, they should form what looks like a brick wall. Then, make sure that each tile end is lined up with the centers of the tiles that are below and above it.
If you like the windmill lay, you’ll love the hop scotch approach! The difference is that instead of using rectangle tiles to wrap around smaller square tiles, all of the tiles will be square. Also known as a pinwheel lay, hop-scotch gives the visual effect of a spinning wheel. To make this tile pattern even more exciting, alternate the colors of the tiles!
This one is another straightforward approach. Each row of tile will alternate from rectangle to square tiles. The english cross lay ensures that there is one square tile centered above each rectangle tile. From there, you just fill in the blanks with square tiles!
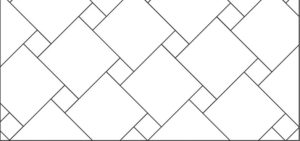
This lay utilizes rectangle tiles. The first set of [4] tiles are laid out next to each other in a square shape. From there, each set of four tiles is laid at a 90 degree angle from the first set. Upon completion, the basket weave lay gives the appearance of a woven tile floor!